Maca – Seed – Choc – Squares (Nut Free)

I’ve been rather quiet of late writing my blog due mainly to the arrival of our littlest Rolt, Ellie. She turned 12 weeks old this weekend, and whilst 12 weeks in some ways seems quite old, she still seems like a bit of a tiddler but is slowly fattening up.

dsc_0500

I have to say, I thought having a second child would be a total breeze and just fit straight into our lives without batting an eyelid. Seb had been such an easy baby that he totally lured us in to a second, a testament to him I think.

However, I have to admit, going from no kids to one was a doddle compared to going from one to two. Those first 6-8 weeks were a total car crash of trying to find a routine as a three (as Will got the luxury of heading back to work) with Seb getting fed up of the endless feeding sessions and lack of attention. But we got there… just!

dsc_0496

And we’re becoming a well-oiled machine now and Seb has become quite the helpful little assistant either fetching muslins for me from across the room, helping with nappy changes and providing Ellie with so many kisses and cuddles that I’m almost jealous. He’s the big brother I knew he would be and I can only pray it carries on untill he realizes she’s after his toys…

With this newfound rhythm in our day-to-day lives and a more organized routine, I’ve had time to get back in the kitchen and bake / make a few things recently which I’ve loved. I made some spirulina cocoa protein balls, blueberry and pistachio cheesecake and most recently, these ‘Maca-Seed-Choc-Squares’.

dsc_0503

I often fancy a post-lunch, early afternoon pick me up and these often come nut-based. So I wanted to create something that still fills that hole in your tummy and satisfies that sweet craving, but without the usual nuts or dates.

dsc_0504

These little bites hit the spot delivering texture from the toasted quinoa, fats from the seeds and plenty of protein from the chai seeds. The dried figs provide a little chew which is a welcome change to dates that seem to be on every ingredient list at the moment. And let’s not forget the goodness you get from the super-power that is Maca powder which supplies you with natural energy and also works as a great immune booster. The chocolate could be left off but I think it compliments the flavours of the seeds and dark chocolate like this is great for you anyway. It’s not like you’re eating a whole bar… unless of course you devour all these bites in one sitting which to be honest does require some serious will power to not do!

dsc_0501

They take no time to make, definitely can be whipped up in a lunchtime nap so there’s really no excuse not to give them a try.

I’ll be taste testing these on Seb later for his post-nursery snack. Fingers crossed it will get signed off by the little man too.

Maca – Seed – Choc – Squares (Nut Free)

Makes about 24 bite-size squares

Ingredients

75g porridge oats

100g uncooked quinoa

50g pumpkin seeds

50g sunflower seeds

50g hemp seeds

150g sunflower butter – can substitute for a nut butter of your choice

1/3 cup rice syrup – can substitute for honey / agave nectar

1 tsp vanilla bean paste / extract

3 tbsp coconut oil

½ tsp sea salt

2 tsp maca (you can leave this out)

1 tsp cinnamon

1 tsp baobab (you can leave this out)

100g chopped dried figs

3 tbsp chai seeds

100g dark chocolate (at least 70& coco) melted

Method

Heat the oven to 180 degrees

Line a couple of baking trays with baking paper and toast your oats, quinoa, pumpkin seeds, sunflower seeds and hemp seeds for 10 minutes.

In a saucepan melt your coconut oil, sunflower butter, vanilla bean paste, rice syrup, maca, cinnamon and sea salt.

Put your toasted ingredients into a bowl, add your chai seeds and chopped figs and pour over your melted nut butter. Mix together thoroughly.

Line a brownie tin with baking paper and press in your mixture to form an even layer. Place in the freezer to firm up.

Whilst the seeded bar is firming up, melt your chocolate in a microwave. It should only take a couple of minutes. Once melted you can stir through your tsp of baobab. Make sure it’s thoroughly mixed in.

Take your brownie tin out the freezer and drizzle over the chocolate before placing back in the freezer to firm up. After about 30 minutes, you can take it out the freezer and cut into bite size squares or bars if you prefer.

You can store them in the freezer and they’ll last up to a month, although very unlikely as soon as you taste one.


Posted in Baking, Biscuits and Cookies, Desserts, Recipes, Snacks | Tagged , , , , , , , , , | 2 Comments

Mint choc ‘sea salt’ chip ice cream

Two weeks ago today, we welcomed into the world Amelie Mae Jackson Rolt and our family was complete.

DSC_0332

Whilst she wasn’t quite as speedy as her older brother (50 minutes!!), there was a moment of panic that she might make her arrival on Barnes High Street. Luckily though, we made it to Chelsea and Westminster Hospital and the safety of the birthing suite and she arrived not long after with a mop of dark hair much to our surprise with Seb being such a blondie.

DSC_0337

Seb has been totally smitten with his little sister, endlessly trying to give her cuddles and kisses, although I’m waiting for the novelty to wear off! That will probably happen just as Will’s paternity leave ends and it’s just the three of us at home. We’ll muddle through though and find a new routine to make our days work.

It’s funny heading back into newborn territory and trying to remember what you did the first time round. You soon realise just how much time you must have had because with an energetic toddler in the house, there is no time for resting and watching endless hours of Grey’s Anatomy! Amelie’s sleep time is spent making puzzles, playing football in the garden and generally showering Seb with as much attention as possible.

DSC_0338

But every so often I manage to time it right with both babies asleep and get to spend a little time back in the kitchen making something to celebrate our latest arrival. I’ve been making a few different ice creams recently but it’s hard not to go back to making one of my favourite ice cream flavours, mint choc chip. It’s a simple ice cream flavor to make and the only adaption I made to this winning combination was to use sea salt flavoured dark chocolate to provide the crunchy choc chips.

DSC_0333

Fresh mint was picked from the garden which gives a clean-cut freshness that you’ll not find using extracts. It is a slightly more subtle mint flavor but I think this pairs beautifully against the creamy vanilla tones originating from the vanilla pod. The dark bitter chocolate provides some crunchy texture and the saltiness cuts through the rich cream making it an addictive flavor combination.

It’s hard not to sit with the tub in hand out in the garden, the sun shining and Amelie having a snooze whilst I devour mouthfuls of moreish ice cream.

DSC_0340

Life is good.

Mint choc ‘sea salt’ chip ice cream.

Makes 1 ice cream tub

Method

For the ice cream:

500ml double cream (split into 250ml jugs)

250ml whole milk

150g granulated sugar

Pinch of salt

1 vanilla pod with the seeds scraped out (keep the pod too)

3/4 tsp vanilla extract

Large bunch of mint, cleaned

For the choc chip:

200g lindt dark sea salt chocolate

2 tbsp coconut oil

To make the ice cream:

Pour 250ml of the double cream into a saucepan and add your sugar and salt followed by the seeds from the vanilla pod and the pod itself. Warm the mixture over a medium heat and continue to sit until all your sugar has dissolved.

Once your sugar has dissolved remove the saucepan from the heat and add the remaining 250ml double cream and the whole milk and stir. Add the vanilla extract, mint and stir again.

Pour into a bowl and chill in the fridge for a few hours or overnight.

Before churning, pour the mixture through a sieve into a jug to remove the mint and vanilla pod.

Churn the mixture in your ice cream machine according to manufacturer’s instructions.

Whilst your ice cream is churning you can get on with melting your chocolate.

To make the choc chip:

Break your chocolate up into chunks and put in a bowl over a saucepan of simmering water. Make sure the water isn’t touching the bottom of the bowl or the chocolate will burn. Add your coconut oil to the chocolate and gently stir every few minutes until the chocolate has melted. Take off the heat.

To assemble:

Once your ice cream has churned add a third to your tub an pour in some of the chocolate and stir through into swirls. The chocolate will harden very quickly so work fast. Then add another third of ice cream on top and some of chocolate and swirl through again. Repeat with the remaining ice cream and chocolate and you should get a good distribution of chocolate chips through your ice cream.

Place your tub of ice cream in the freezer to firm up properly.


Posted in Baking, Creamy Desserts, Desserts, Ice Cream, Recipes | Tagged , , , | 1 Comment

Roasted balsamic strawberry and coconut tarts

I started writing this blog last Sunday morning and then a little person by the name of Amelie Mae Jackson Rolt decided to show up! So I’m rather late posting it and obviously I wrote it a week ago, so you’ll have to forgive my tardiness but I’ve been rather distracted with cuddles and snuggles this past week.

DSC_0314

Monday saw the start of Wimbledon which is two weeks of the year I love. I love everything about it; from the total ‘British-ness’ of the event, the vibe in Wimbledon village and the fact that it’s stuck to its guns and kept that all white dress code. I love the interviews with people queuing each morning and seeing what the new towel design is each year (!), and seeing how quick the ball boys and girls can get the cover over the courts when it rains! Maybe it’s because I was born on Women’s Finals Day that it’s just in my blood.

DSC_0311

I’ve been lucky enough to go a number of times over the years, once being with my Dad a long time ago to see Courier take on Sampras in the 1993 final. I was a massive Courier fan rather than Sampras as I loved his ridiculous ‘western grip’ forehand and how he just seemed to work so hard out there on every point, but much to my dismay, Sampras came out victorious.

Will and I have been a couple of times and the last time we went we really ‘got it right’. I’m all about having a picnic on Henman Hill / Murray Mound (depending on which generation you grew up in) and soaking up the atmosphere. We packed our cool bag with everything M&S could offer and of course a couple of bottles of Prosecco and some cans of Pimm’s to keep us going through the day. We had great seats on Number One Court and were lucky enough to get some decent matches whilst nipping out to ‘the hill’ to catch some of Murray. The sun shone on us and the day lived up to all expectations.

DSC_0317

Of course when you think of Wimbledon you think of strawberries and cream, Pimm’s and maybe the odd game of tennis goes on in the background. Strawberries can’t get much better than they are right now in the UK and we’re going through packets and packets of them on a weekly basis – mainly consumed by just me and Seb. We’ve made strawberry overnight oats for breakfast, strawberry and banana smoothies for the afternoon and best of course just served as they come straight out the packet watching the boats go past on the River Thames.

DSC_0318

It’s hard to mess around with a fruit when it’s so good just served fresh as it comes, but I think these little roasted balsamic strawberry and coconut tarts work beautifully as a summer dessert for a picnic or to finish off a BBQ in the sunshine whilst watching the tennis.

DSC_0313

The base is a lovely raw combination of medjool dates, macadamia nuts and almonds. The whipped coconut cream is sweet and light and provides a gorgeous pillow for the roasted balsamic strawberries to sit up proud on. It’s really pretty simple but the combination of flavours provides the strawberries with their shining moment in an alternative way to being served up fresh from the packet.

Roasted balsamic strawberry and coconut tarts

Serves 2

Ingredients

Base

3 medjool dates soaked and softened

30g macadamia nuts

30g almonds blanched

½ tsp cinnamon

½ tsp vanilla bean

1 tbsp melted coconut oil

Coconut cream filling

1 can of full fat coconut cream left to harden in the fridge overnight

1 tsp vanilla bean

2 tsp honey / agave nectar / maple syrup

Strawberry Topping

300g strawberries hulled and cut in half or quartered if they are very large

3 tbsp balsamic vinegar

3 tbsp coconut sugar

Method

To make the base

Butter your tart tins really well.

Begin with your base by placing all your ingredients in a food processor and blend to your ingredients come together a little.

Spoon your ingredients into your tin and using the back of a spoon press into your tin to make an even layer all the way round.

Place your tarts in the fridge to harden.

To make the coconut filling 

Open the cans of milk carefully so that you can scoop the cream off the top and place in a mixing bowl. You can use the left over water for smoothies or just drink away (once poured into a glass!)

Whip your coconut cream, honey and vanilla bean for a few minutes into you have soft light peaks, as you would with double cream.

This will be more than enough cream for the two tarts but you can use the rest with fresh fruit or in your porridge, or with some granola. Delicious!

To make the strawberry topping

Turn your oven to 180 degrees.

Mix your strawberries with the balsamic vinegar and coconut sugar and leave to marinate whilst your oven heats up.

Pour the strawberries along with the liquid into an oven proof dish and bake for about 10 minutes. You don’t want the strawberries to turn to mush and to keep some texture.

Once roasted, remove from the oven and place in a bowl to cool.

 To assemble

Remove your tarts from their tins. I think the easiest way to do this is to place the tin on top of a small glass and gently maneuver the outer tin downwards. If it’s sticking leave for a few minutes and the buttered tin should loosen. You can always serve them in the tin if you think your base might break!

Spoon in your coconut cream to form an even layer.

Top with your strawberries and some of the balsamic glaze.

You can keep these in the fridge to serve when you’re ready.


Posted in Baking, Breakfast, Creamy Desserts, Desserts, Recipes | Tagged , , , , , , | Leave a comment

Blueberry and Pistachio Ricotta Cheesecake

Today is Father’s Day and it’s easy to get swept up in making sure your kids have come up with something creative for their Dad and forget to be thankful for your own Dad and remember how lucky you are to have them in your lives.

DSC_0301

I’m especially lucky I think to have a Dad that has always been there to support me in whatever decisions I made, can direct me in the car no matter where in the country I am (in the days before Sat Nav and Google maps!), doesn’t mind reading every blog I write to check for grammar and spelling mistakes, uses emojis almost as much as I do on WhatsApp and most importantly loves me for exactly who I am. And I have to say it’s the sweetest thing in the world to see how much Seb adores him and watching them walk off hand-in-hand every week when Dad helps to look after Seb.

DSC_0298

A lot of my childhood was dominated by going round the country playing tennis tournaments and whilst Mum took on the majority of the driving, I do remember a number of trips in the car, particularly before the bigger matches where Dad came along too and would often put on Rocky ‘Eye of the Tiger’ in the car in an effort to get me geared up for the big match. Makes me chuckle to think back about that now.

He even flew with me to Florida when I was 13 years old and dropped me off at a tennis academy to then get the next flight home so that I didn’t have to travel by myself. He was more than happy to stick me on the plane by myself the next time, although he might have regretted it when I got a little lost in Miami airport and called home probably causing a very large phone bill!

DSC_0292

Whilst I won’t be seeing Dad on Father’s Day, I did sneakily send Mum home with a card and present earlier in the week. I wasn’t sure he would appreciate the present Seb made Will which was his footprints on a card saying, ‘I love you Dad from the top of my head to the tips of my toes’ and actually a decent bottle of red was rather more up his street.

We had friends round for a BBQ on Father’s Day and we finished off the meal with this delicious blueberry and pistachio ricotta cheesecake. I had a tub of ricotta in the fridge and that’s really where the inspiration came from. I came across a recipe by Honey & Co. (a lovely restaurant in town) and just played around with the ingredients a little to work with what we had in the cupboards.

DSC_0302

The ricotta keeps the cheesecake beautifully light and moist, which is why I’m calling it a cheesecake rather than a cake. The blueberries bursting with tartness and the use of ground nuts providing texture within the sponge and the green jewel pistachios on top delivering that much needed crunch. You could definitely sub in different fruits or nuts, I’m sure raspberries and hazelnuts would be a delicious combination.

DSC_0304

Happy Father’s Day to all those Dad’s out there. No idea what we’d do without you.

Blueberry and Pistachio Ricotta Cheesecake

Makes 1 cheesecake

A take on recipe by Honey & Co.

Ingredients

115g unsalted butter, softened

125g caster sugar

3 eggs

25g plain flour

zest of 1 lemon

½ tsp of salt

1 tsp ground ginger

150g ground almonds

250g ricotta cheese

200g blueberries

50g pistachios

2 tbsp golden granulated sugar

Method

Line and butter a 23cm loose bottom cake tin.

Preheat your oven to 180 degrees.

Begin by creaming together your butter and caster sugar in a mixer until it is light and creamy.

Add one egg at a time, making sure each egg is well incorporated before adding the next.

Add the flour, salt, lemon zest, ground ginger and ground almonds and mix well until the mixture is properly combined.

Add your ricotta and gently fold through until it is incorporated in the batter.

Add half your blueberries being careful not to burst them.

Spoon the mixture into your tin and smooth out to form an even layer.

Sprinkle on your remaining blueberries, pistachios and top with the granulated sugar.

Bake in the oven for 55-65 minutes until the cheesecake has set. The blueberries will have exploded a little and the nuts will be toasted.

Leave to cool in the tin before removing from the tin and placing in the fridge to set properly.

The cheesecake will keep for 3-4 days in the fridge.

Best served at room temperature on it’s own or with some crème fraiche if you like.


Posted in Baking, Cake, Creamy Desserts, Desserts, Recipes | Tagged , , , | 3 Comments

Sunshine smoothie bowl!

It’s taken me a long time to get on the smoothie band-wagon let alone the smoothie bowl steam train. I’m still firmly in the camp of I’d rather eat and chew my food than drink it. I figure I eat too fast as it is and drinking my food only speeds up this process further. Plus I never feel quite so full at the end of drinking what is meant to be a meal, rather than eating it. I get to the end of the smoothie and I’m like ‘what’s next?’

DSC_0280

However, with a rather finicky child when it comes to veggies, especially green veggies, I find making a smoothie is an easy way to get some green veggie power into him and he is none the wiser. In fact, he thinks it’s a real treat! I score that one nil to Mum.

The only thing is, he does seem to prefer us getting smoothies out than at home. It’s like he wants to see me hand over the cash. I suppose it’s better that way round than me buying him smoothies (which are extortionate and must have almost as much mark-up as coffee) and him not drinking them. Although, there would be more for me that way.

DSC_0279

I don’t know what it is but I just find it so damn cute when Seb’s slurping away on a smoothie. I must have a million photos on my phone of him with various smoothies. It’s like ‘look at us! We’re such a healthy duo, sipping away on our green smoothies!’

IMG_0807       IMG_0804

I’ve been making banana ice cream a lot for Seb, which is a lot like soft serve in texture and has the bonus of just needing one ingredient, frozen bananas. But not everyone is mad keen on bananas, but most can’t say no to ice cream. By adding the mango and mint, it totally masks the banana taste and just delivers a truly refreshing flavour ice cream or as it’s now called… smoothie bowl!

The main difference between a smoothie and a smoothie bowl, from what I can gather is that the you can eat a smoothie bowl with a spoon as it’s a little thicker due to the extra bananas thrown in. And of course let’s not be forgetting the toppings you can put on a smoothie bowl. If I’m truly honest, it’s always about the toppings and the more the merrier.

DSC_0278

For this smoothie bowl I decided some contrast colours would look inviting and they came in the form of extra sunshine mango, tart raspberries and sweet dessicated coconut as a little crunch on top. The spinach flavor is totally masked by all the other clean summer flavours, so just chuck it in and don’t be shy about it.

DSC_0275

This is the perfect summer time breakfast, afternoon drink, after BBQ pudding. It’s an all rounder and your kids will fight you for it.

Sunshine smoothie bowl!

Serves 1

Ingredients

1 ½ sliced frozen bananas

Large handful of spinach

Handful of mint leaves

One mango, keeping ¼ back for decoration

Add some coconut water or tap water to thin out as desired

Toppings:

Mango

Raspberries

Mint leaves

Dessicated coconut

Method

Chuck everything in your blender / nutribullet and blend till you have reached your desired consistency.

Pour into a bowl and add your toppings.

If you’d like it thinner to make it drinkable, just add more water and some ice.


Posted in Breakfast, Desserts, Dinner, Lunch, Recipes, Smoothies, Snacks | Tagged , , , , , | Leave a comment

Strawberry Rose Tart

DSC_0266

This weekend as is traditional in the ‘Smith’ family we all headed to my parents for my Mum’s birthday. It’s nice knowing that whatever happens, however busy we all are, we all make an extra special effort to ensure we keep the weekends free for celebrating birthdays in our family. It means that excluding Christmas, there is at least six occasions in the year when everyone gets to catch up, have a drink and keep up-to-date with what we’re all up to. And it’s been like that for as long as I can remember.

DSC_0263

I think that makes us pretty lucky as a family and I’m looking forward to when my sister moves back to the UK and can join us at the kitchen / garden table in person rather than on skype sat at the table on a computer screen!

Mum normally conjures up the desserts for these birthday celebrations but seeing as it’s her birthday, my Dad and I did our best to only let her make some ice cream so that I could provide the birthday cake / tart.

DSC_0265

I saw this dessert on a blog that I love to read called ‘how sweet it is’ and it immediately came to mind as the perfect dessert to make for Mum on her birthday. The author of the blog, Jessica, has the most infectious love of all things food that just reels you in and makes your mouth water at all the beautiful photos she takes of her creations. You just wish you lived in her household so that you could get to taste it all… although I’d be about five stone heavier if that was the case… she doesn’t hold back on the extras which makes you like her even more.

DSC_0261

The great thing about this tart is that it is so beautifully simple to make but looks like you must have been slaving away in the kitchen for hours to make something so delicious and pretty. With fresh juicy strawberries in season and the fact that they are cut into delicate roses, it really does shout the perfect summer pudding for any celebration.

The only twist I made on this pudding was to create a crust using nuts, oats and dates rather than a more traditional cheesecake base of butter and digestive biscuits. I thought the crunch of nuts and oats would work well against the smooth creamy mascarpone smothered on top and I wasn’t wrong.

DSC_0264

It was like having a lovely flapjack base (without all the sugar) and the rose strawberries stood bright and inviting against the pillows of mascarpone cream.

It got Mum’s approval and that’s the main thing.

DSC_0267

Strawberry Rose Tart

A small twist on the recipe Strawberry Rose Tart from How Sweet Eats

Ingredients

For the base:

200g cashews

100 organic rolled oats

200g medjool dates, soaked in water to soften for a few hours

½ tsp vanilla bean

For the filling:

350g mascarpone cheese

150g icing sugar

½ tsp vanilla bean

For the topping:

14-16 strawberries (depending on the size of the strawberries) cut into roses if you have the time!

Fresh mint leaves

Honey for drizzling

Method:

To make the base:

Pre-heat your oven to 170 degrees.

Butter ‘well’ your 4 x 14 inch loose bottomed tin.

Place all your ingredients into a food processor and pulse until you’ve got a crumbly texture, you don’t want flour, but you need the dough to be sticking together.

Press the mixture into your tin and up the sides to create your crust. Try to make it as smooth and even as you can with the back of a spoon. You might have a bit too much mixture, so don’t over fill once you’ve got a thin even layer of crust in your tin.

Bake in the oven for 20-25 minutes. You’re looking for a light golden colour.

Leave to cool in the tin. You can make the crust up to a couple of days in advance and store in an airtight container or covered in cling film. Leave it in the tin for now in case you knock it. It will be quite crumbly.

To make the filling:

Stir together the mascarpone, icing sugar , lemon juice and vanilla bean paste until it is well combined, creamy and spreadable on your base. Spread the mascarpone filling into your base so that you have an even layer and place in the fridge to chill.

When you’re ready to serve, add your strawberries, mint leaves and drizzle on some honey if you fancy.

Remove from the tin before serving, it should just slide out if you buttered the tin well!

Serve immediately.


Posted in Baking, Biscuits and Cookies, Creamy Desserts, Desserts, Recipes | Tagged , , , , , , | 2 Comments

Rhubarb Eton Mess

This weekend Will and I celebrated our 5 year wedding anniversary. Wow time flies! So much so that I was convinced it was 4 years and had actually written the card saying it was 4 years and had planned a dessert on the fact that it was 4 years because the traditional gift for 4 years is flowers or fruit and now it turns out I should have come up with a ‘wood’ based present. (And breathe!) Total wife fail on my part (holding head in shame!).

DSC_0254

I have a feeling he’ll forgive me though, when he spots the rhubarb Eton Mess in the fridge and the pizza dough proving – which was his meal request this weekend.

We’re actually getting to go on a rare evening out to our local (but ridiculously good – The Brown Dog in Barnes – it’s so worth a visit) restaurant on our actual anniversary, but I still thought a yummy home cooked dinner was required to finish off the celebrations properly the following evening.

DSC_0259

I have so many amazing memories of our wedding day but nothing stands out more than walking up the aisle and seeing Will turn round with a big smile on his face and knowing this was the start of the rest of our lives.

When people say; try and just take the day in because it goes so fast, they couldn’t be more right. The day flew by with a flurry of surprises we’d organized for the guests from chefs carving at the tables, a cheesecake wedding cake, a sweets table, a photo booth, Pimm’s Bar in the barns and a headphone disco to top off the evening! It was pretty epic and I’d love to do it all again tomorrow. Maybe for our 10 year wedding anniversary we can renew our vows…my parents do love to host a party (you know it would be fun Mum and Dad).

DSC_0253

Now back to the dessert I had already planned for our 4 / 5 year wedding anniversary.

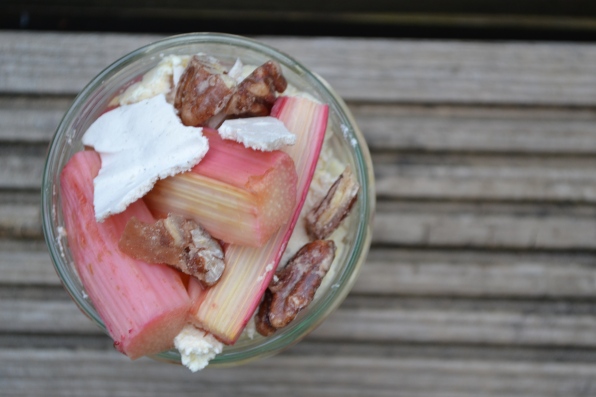
Will is quite a fan of an Eton Mess, so much so he regularly suggests it when we have a dinner party, but I’m always keen to try something new. But because I’m so nice and I know how much he has a soft spot for this dessert, I thought I could make a twist on the traditional Eton Mess made with strawberries and raspberries. Rhubarb is in abundance in the shops at the moment so I wanted to use this beautifully pink tart fruit in place of the berries and pair it with some rhubarb ripple ice cream with praline pecans. I thought I could bring the two together by adding a few chopped praline pecans to the Eton Mess as well.

DSC_0260

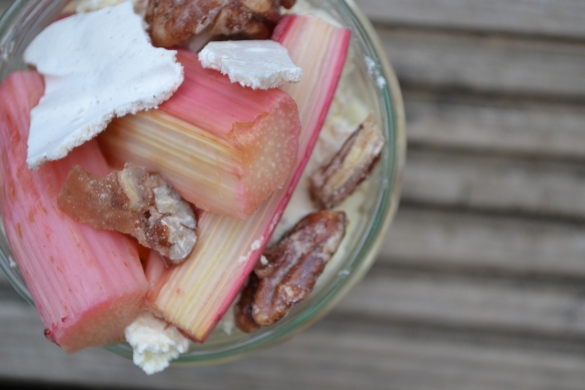
Let’s be honest, you can’t go wrong with rhubarb, cream, meringue and pecans and this didn’t disappoint. It has the components of an Eton Mess but with some additional crunch from the pecans and tartness from the rhubarb. You don’t have to add the ice cream (in fact we were so full after dinner, we decided to forgo the ice cream) to the side if it seems like too much of an additional faff, the rhubarb with the cream and meringue is still a winning combination especially with rhubarb being in season right now.

Even if you’re not celebrating an anniversary this weekend, I still think you should celebrate with this indulgent rhubarb Eton Mess for pudding and put a smile on your loved ones face.

DSC_0257

Rhubarb Eton Mess

Serves 4

For the filling:

400g rhubarb cut into 3 cm chunks

Tbsp coconut sugar or light brown sugar

300ml whipping cream thickened

1 tsp vanilla extract / vanilla bean

For the meringue:

2 large egg whites

110g of caster sugar

½ tsp ground cinnamon

1/4 tsp ground ginger

For the topping:

Praline pecans – see recipe for the ice cream below

Method

For the filling:

Heat your oven to 180 degrees C

Place your chunks of rhubarb onto a lined baking tray and sprinkle with coconut sugar. Place your baking tray in the oven for 15-20 minutes. You don’t want them to turn to mush so keep an eye on them.

Leave to cool before transferring to a bowl ready for assembly later.

For the meringues:

Place the egg whites in a large bowl and using an electric hand whisk or Kitchen Aid mixer, whisk on a low speed.  Continue for about 2 minutes, until the whites are foamy, then switch the speed to medium and carry on whisking for 1 more minute. Now turn the speed to high and continue whisking until the egg whites reach stiff-peak stage.

Next, whisk the sugar in on a fast speed, a little at a time (about a dessertspoon), until you have a stiff glossy mixture. It is important that you don’t just add all the sugar in one go. Just at the end add your cinnamon and ginger and mix through.

Spoon heaped dessertspoons of the mixture on to a baking sheet lined with baking parchment.

Space the two meringue nests with enough room between them as they will spread a little on baking.

Don’t worry too much about making them look pretty as you’ll be breaking them up later anyway.

Pop them on the center shelf of the oven, immediately reduce the heat to 140°C and bake for 30 minutes.

After 30 minutes, turn the oven off and leave the meringues in the oven to dry out in the warmth of the oven until it is completely cold (this will take about 4 hours).

When cold, take the meringues out the oven and place in an airtight container ready for later when you create your dessert. You can freeze the meringues at this point if you are making them well ahead or having made a bigger batch.

For the assembly:

Beat the cream until slightly thickened, then add in your icing sugar and vanilla extract and continue to beat until the cream is thick. Keep an eye on it as it’s easy to over whip before you know it.

Crush up your meringues into decent size chunks and then fold the chunks through your cream.
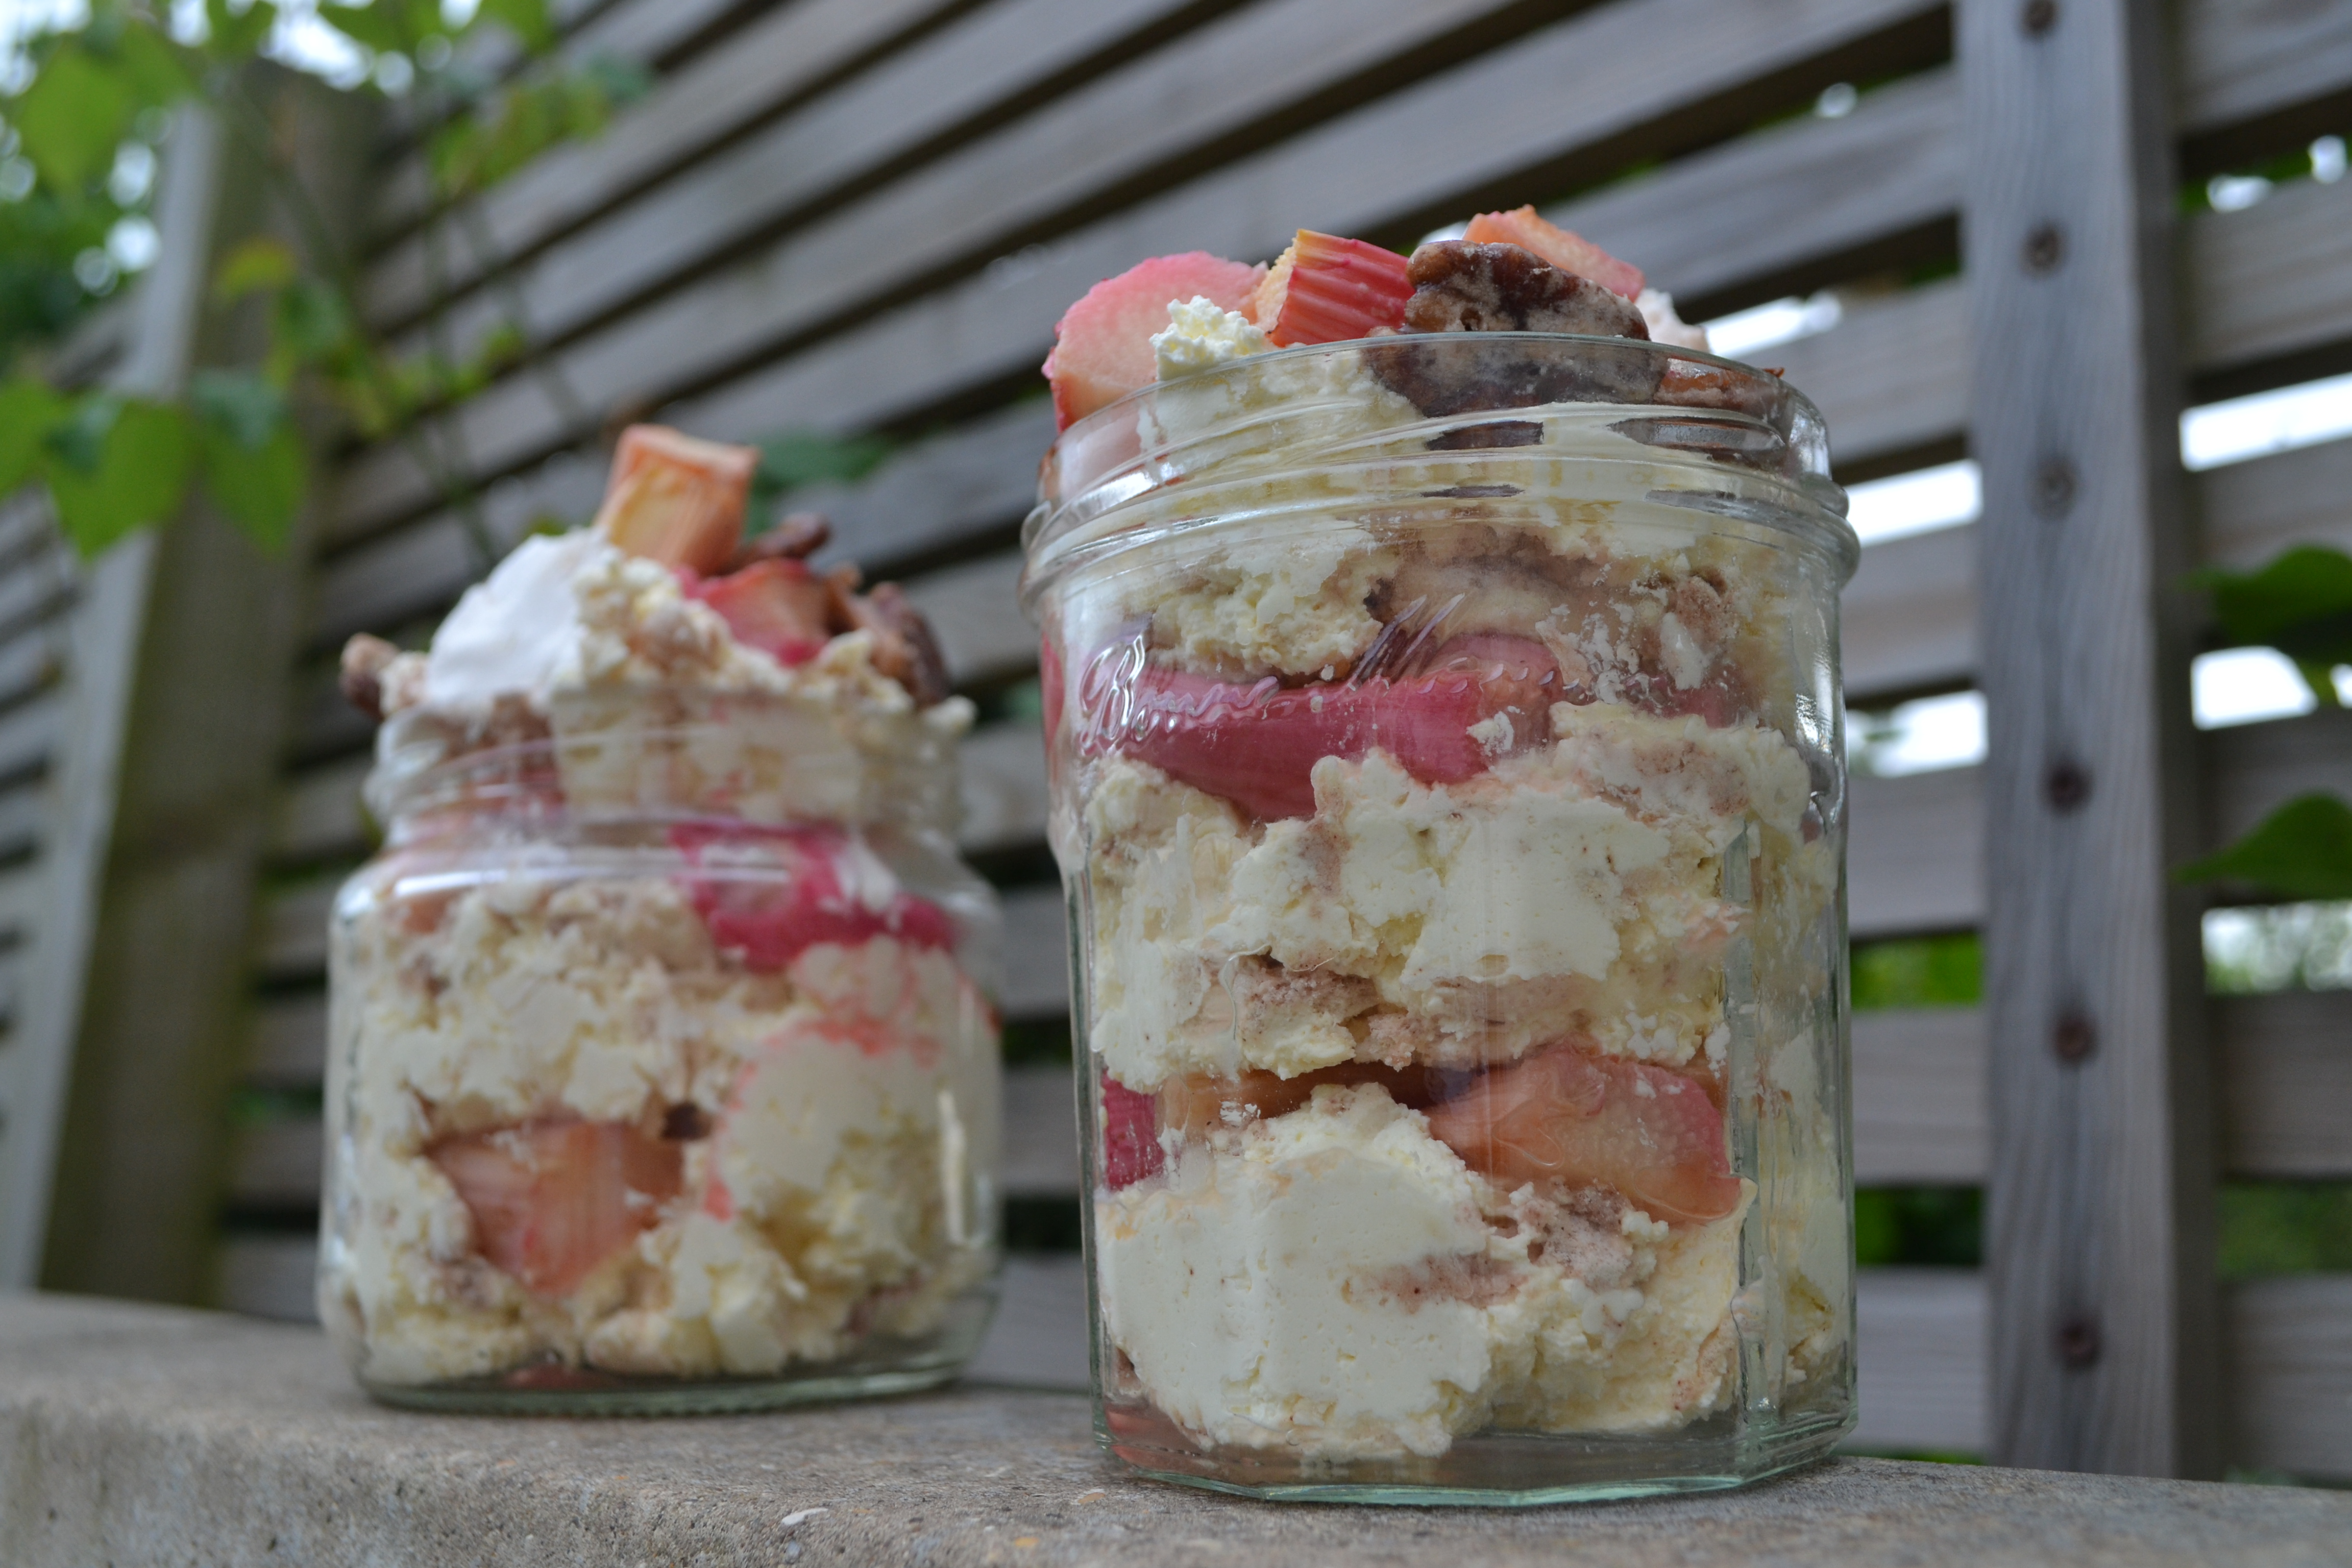
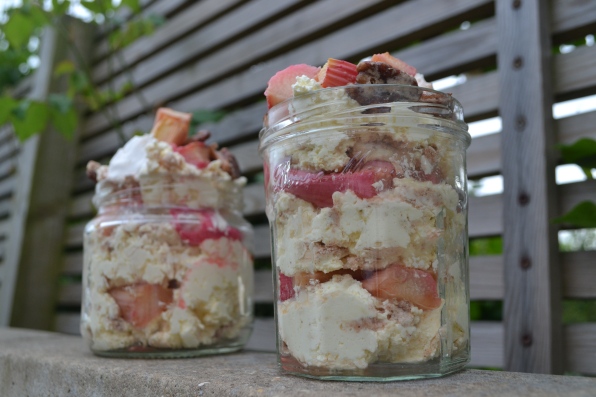
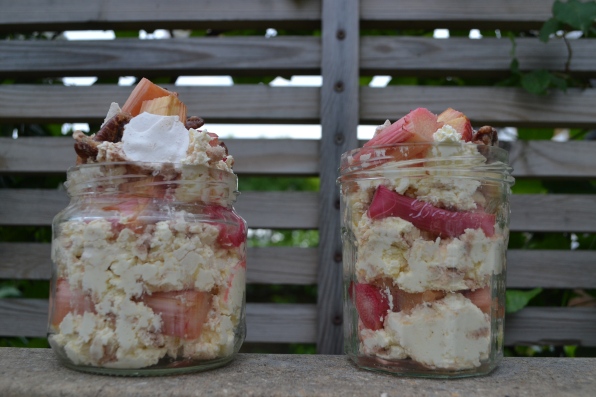
For the Eton Mess:

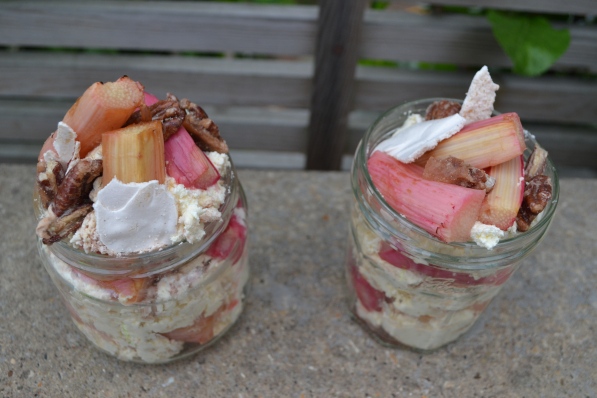
Begin with dollops of the meringue & cream mixture at the bottom of your jar/ glass followed by chunks of rhubarb and continue until you have a full jar.

Sprinkle on your praline pecans for decoration.

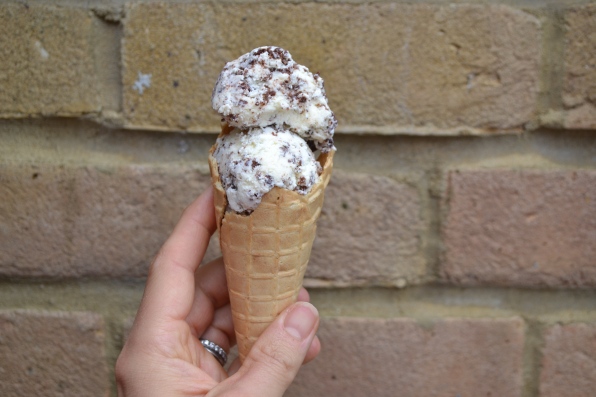
Serve with a side of rhubarb ripple ice cream for extra indulgence!

Rhubarb Ripple Ice Cream with Praline Pecans

Recipe for the vanilla ice cream taken from David Lebovits ‘The Perfect Scoop’

Makes a large tub

Ingredients

For the ice cream:

500ml Double Cream

250ml Full-fat milk

150g granulated sugar

1 vanilla pod, seeds scraped out, keep the pod too

¾ tsp vanilla extract

Pinch of salt

For the rhubarb ripple:

400g rhubarb cut into 3cm chunks

½ tsp ground ginger

½ tsp ground cinnamon

2-3 tbsp of water

For the praline pecans:

135g pecans

60ml water

100g granulated sugar

pinch of sea salt

Method

For the ice cream:

Pour 250ml of the double cream into a large saucepan. Add your sugar, salt and vanilla seeds along with your pod to the saucepan.

Gently warm the mixture, stirring all the time until your sugar is dissolved and you can take it off the heat.

Once removed from the heat, add your remaining cream, milk and vanilla extract and stir through.

Pour the mixture into a jug (this will make it easier to pour into the ice cream bowl later) and chill in the fridge for at least a few hours or over night.

You can now get on with making your rhubarb ripple and praline pecans.

When ready to churn, remove the vanilla pod and then freeze the mixture in your ice cream machine according to its instructions.

For the rhubarb ripple:

Place the rhubarb, ginger, cinnamon and water in a saucepan and heat on a medium heat for approximately 20 minutes. You are looking to achieve soft rhubarb but you don’t want it to burn or to turn it to jam! A little juice is good as it will help with that ripple effect you are looking for. Once you have the desired consistency, remove to a bowl and leave to cool. This can be kept in an airtight container for a few days.

For the praline pecans:

Mix the water, sugar and pecans in a large saucepan / frying pan on a medium to high heat. Continue to stir with a wooden spoon until the sugar has dissolved and the liquid has boiled.

Reduce the heat and continue to stir until the liquid has crystallised and become sandy. You will then notice the crystals begin to liquefy and this is what you need to coat your pecans in to give them a glazed glossy coating.

Once your pecans are lovely and shiny pour onto a lined baking tray – trying to space them out a little and sprinkle with the sea salt.

Leave the pecans to cool before touching as they are VERY hot!

Once cooled, using a strong large knife, cut into chunks of a variety of sizes.

You are going to use ¾ of your pecans in your ice cream and keep the rest back for decoration on your Eton Mess.

Assembly of the ice cream:

Once your ice cream is nearly churned, you can either add your rhubarb ripple and pecans to the churning process or I find it easier to finish off the churning process completely and add the extras after.

Spoon out enough ice cream to cover the bottom of your airtight container before adding dollops of rhubarb and sprinkles of pecans. Top with more ice cream before adding your rhubarb and pecans again. Repeat this process until you have used up all your ice cream, rhubarb and pecans. Work quickly though so that your ice cream doesn’t melt too much.

Place your airtight container in the freezer to freeze properly.

Serve along side your Eton Mess.


Posted in Baking, Creamy Desserts, Desserts, Ice Cream, Recipes | Tagged , , , , , , | Leave a comment

Mini quinoa chocolate puffs (the raw healthy version of a rice crispy cake!)

When thinking about Seb’s 2nd birthday party this weekend you can’t help but think back to birthday parties you celebrated when you were younger. As my birthday falls at the beginning of July it often meant that my birthday party coincided with the end of term and of course the start of the much anticipated summer holidays.

DSC_0228

I was lucky enough to grow up in a beautiful house in Northaw that had the most awesome garden. Loads of space to run around and more importantly, space to play a proper game of rounders – my favourite sport at school. Most of my birthdays revolved around games of rounders in the garden, parties in the sunshine and amazing birthday cakes courtesy of my Mum.

A very early memory I have is of dressing up as Rainbow Bright, my obsession as a young girl and my Nanny had made me THE most amazing rainbow bright outfit to wear and Mum had surpassed herself with a fabulous Rainbow Bright birthday cake. Now I’m absolutely positive there is photo evidence of this Rainbow Bright outfit which unfortunately didn’t survive very long as our dog Barnaby also took a shining to it and decided to have it for afternoon tea.

DSC_0230

Staples of birthday parties in those days were party ring biscuits, finger sandwiches, iced gems, cupcakes and rice crispy cakes. I remember making rice crispy cakes with plenty of melted dairy milk, lashings of rice crispies dolloped into cup cake cases and left to set in the fridge whilst I licked the chocolate off the spoon.

I wanted to take a stab at making those rice crispy cakes but using slightly less sugar fuelled ingredients.

DSC_0227

Quinoa puffs have been popping up on my feed on instagram more and more frequently either used as part of a smoothie bowl for breakfast or as an ingredient in ‘raw’ chocolate bars. Flicking through ‘Deliciously Ella’s’ cookbook I spotted she had made quinoa and cocoa crispy treats and they looked super simple to conjure up on a Sunday afternoon.

I used her recipe as the basis of my mini quinoa chocolate puffs but used a lot less raw cocoa as I think it is so rich anyway you can get away with using less, plus I wanted Seb to enjoy them and I thought it might be a bit too bitter for him. I also made the addition of adding a few different toppings, which you can sub for other nuts or just leave them plain.

DSC_0229

These are great bite size snacks that can be eaten straight from the freezer as a little treat after dinner, but without the sugar rush of rice crispy cakes. I don’t think you get quite the same ‘crunch’ of a rice crispy cake but actually that made them easier for Seb to munch through and it’s not something I missed. The pure chocolate taste of raw cocoa is so delicious and I liked the element of the different nut toppings to add another flavor.

DSC_0226

Seb unsurprisingly always went for the ones topped with the rainbow of sprinkles… I think Rainbow Bright would have approved.

Mini quinoa chocolate puffs

Inspired by Deliciously Ella’s Quinoa and Cacao Crispy Treats 

Makes approx 24 (mini cupcake size)

Ingredients

70g quinoa puffs

5 tbsp raw cocoa powder

5 tbsp coconut oil

4 tbsp maple syrup or agave nectar if you prefer

2 tbsp smooth peanut butter (or sub for another nut butter)

Toppings of your choice, I used chopped pistachios, chopped hazelnuts and rainbow sprinkles.

Method

Place your coconut oil in a bowl over a saucepan filled with water that is simmering.

Once melted add your cocoa powder, maple syrup and peanut butter and mix well to combine.

Once it’s combined, take off the heat and add your quinoa puffs and mix thoroughly so that your quinoa puffs are covered thoroughly with the chocolate mixture.

Spoon the quinoa puffs into your cup cases and sprinkle on your toppings before placing in the freezer to harden.

These will last in the freezer in an airtight container for about a month.


Posted in Baking, Biscuits and Cookies, Desserts, Recipes, Snacks, Sweets | Tagged , , , , | 1 Comment

Peanut butter & banana overnight chai-oats and Carrot cake bircher muesli

Finally summer feels like its on the way and with a heat wave hitting the UK over the past week (although it is currently pouring down as I type this), I feel like the summer wardrobe is here to stay. We got the BBQ out last weekend, two nights running and it was lovely to sit outside in the garden into the evening sipping on a glass of wine whilst devouring homemade burgers one night and chicken kebabs the other. We enjoyed lunches by the river in the baking sunshine and followed them up with plenty of ice cream. Seb couldn’t believe his luck as he tucked into his first bowl of chocolate ice cream.

DSC_0206

We’ve got a busy few weekends coming up and the all important job of moving Seb into his new ‘big boy’ bedroom decorated with plenty of dinosaurs and (unintentionally) glow-in-the-dark dinosaur curtains that I’m hoping don’t scare the life out of him on his first night in his new room. He seemed suitably impressed the first time he wandered up there to see what we’d been up to and let out a loud ‘wow!’ which made all the hard work worthwhile.

DSC_0204

We’re celebrating Seb’s birthday (a week early) with a BBQ, Beers and Brownies 2nd birthday party at home with some friends and grandparents. I still need to get my head round how I’m going to make a train cake for him and have spent far too long looking at train cakes that I wake up in a cold sweat at night having nightmares about producing one! As I’ve said before, my artistic skills are clearly lacking and my dislike for all things fondant mean I better improve my buttercream piping skills sharpish. More on how that goes another time though.

DSC_0215

With the sunny weather forecast again, this should really be a recipe about ice cream, but I’ve not quite got round to making another batch just yet, although I have my eye on a few different flavor combinations to try. Instead (I’m sorry) this is another breakfast recipe… I really am obsessed by breakfast clearly. So much so in fact, I couldn’t just pick one recipe this time and instead am providing with you two flavor combinations to try.

DSC_0200

The first recipe, ‘Peanut butter and banana’ evolved because to be honest, I just love peanut butter. Give me a teaspoon, hell give me a tablespoon and a tub of it and I’m happy. Peanut butter and banana is a tried and tested flavor combination that you just know is going to start you off on the right foot in the morning. You don’t need to add any extra sweetness in terms of honey or syrup because the ripe banana does all that work for you. And well, I don’t need to tell you how great peanut butter tastes, but it also provides a bucket load of good fats and protein, which will keep you going all morning.

DSC_0212

The second recipe, ‘Carrot Cake’, was conceptualized because I’d seen lots of people adding grated courgette to their porridge (which they call zoats) and I wondered how that might work with finely grated carrot. This is a step forward for me as carrots really are one of the few vegetables I can just about tolerate now but still won’t choose, but I try to get Seb to eat all the time. He’s always much more keen to try new things if he sees me eating them so I made us both a batch this week for breakfast before we hit swimming lessons (for him) and the gym (for me.).

DSC_0197

The cinnamon and ginger spices conjure up those flavours you’re familiar with from a traditional carrot cake and I think the coconut yoghurt brings a lovely indulgent creamy sweetness. You can of course sub this for Greek yoghurt if you’re really not a fan of coconut yoghurt, but I really think it’s worth a try in this instance. The toasted pecans on top give a much needed crunch and bite against those soft plump oats and If you shut your eyes I think you can almost be fooled into thinking you’re having some freshly baked carrot cake.

Two recipes, both can be prepared the night before and toppings added in the morning so that you can take it for an on the go breakfast, but best enjoyed with a coffee in the garden with a newspaper and plenty of sunshine.

Peanut butter & banana overnight chai-oats

Serves 1

Ingredients

65g rolled oats

1 tbsp chai seeds

1/2 tsp ground cinnamon

1 tsp vanilla extract

1 tbsp smooth peanut butter

250ml nut milk (I use almond milk)

To serve

1 large ripe banana (1/2 to be mashed, ½ to be sliced as topping)

extra peanut butter

toasted peanuts

Method

Place your oats, chai seeds, ground cinnamon, vanilla extract, peanut butter and milk in an airtight container / jar and mix.

Place in the fridge overnight.

In the morning, mash half of your banana and mix through your oat mixture. To serve, place your chai-oats in a bowl or jar and top with sliced banana, as much extra peanut butter as you fancy and some toasted peanuts.

Carrot cake bircher muesli

Serves 1

Ingredients

50g oats

15g buckwheat groats

¾ tsp ground cinnamon

¼ tsp ground nutmeg

½ tsp ground ginger

1tsp vanilla extract

1 tsp agave nectar

250ml nut milk (I use almond milk)

1 tsp pumpkin seeds

1 tsp sunflower seeds

handful of grated carrot

To serve

Grated carrot

coconut yoghurt or Greek Yoghurt

handful of toasted pecans

Method

Place your oats, buckwheat, cinnamon, nutmeg, ginger, agave nectar, grated carrot, pumpkin and sunflower seeds in an airtight container / jar followed by the milk and mix well.

Leave overnight in the fridge.

Serve topped with yoghurt, more grated carrot and toasted pecans.


Posted in Breakfast, Recipes, Snacks | Tagged , , , , , , , , | Leave a comment

Nutty-oat chocolate bites topped with pistachios and goji berries

My younger sister Emily, has just been on the first of two hen dos, the first taking place in Bangkok as she lives in Hong Kong. The second is later in the year when she’s back in the UK in July, which I’ve had the pleasure of organising along with the other bridesmaids.

DSC_0196

By coincidence it was this time 4 years ago that I was on my hen do in London. It was the bank holiday weekend and the weather was just fabulous, much like this weekend in fact.

We started with a slightly more reserved ‘Not afternoon Tea’ at the Oxo Tower with breathtaking views over the River Thames. The sun was shining, beautiful views, fantastic food and drink and more importantly all my most significant ladies around one table; it was a great start to a very fun weekend. The Prosecco was endlessly topped up, we devoured stunning desserts and everyone was in a great mood.

DSC_0193

With everyone a little tipsy by the end, we headed onto our hired apartment in South Kensington to put our party dresses on ready for an evening of dancing and singing at The Piano Bar on High Street Kensington (London’s best kept secret). It was an epic evening and the piano man, Michael Moore, did us proud with all the classics and put up with endless song requests from our table. I think towards the end of the evening he might have regretted to agree to come sing at my wedding day!

Over the weekend there were dance lessons (an attempt was made to master Beyonce’s ‘single ladies’ dance) manicures and pedicures, lunches, dinners as well as a spot of dancing and I think a bottle or two of apple sours to toast our Loughborough University days might have been drunk too. It really was one of those weekends you can’t help look back on with a big smile on your face.

DSC_0189

Now I can’t spill the beans on what I have planned for Emily, but I hope she’ll look back on her UK hen do with just as big a smile. There will of course be giggles, bubbles and I’m sure some sweet treats, although more than likely with a little more sugar in them than these addictive chocolate bites.

These are packed with oats, buckwheat groats and an array of nuts, topped with almond nut butter and covered with bitter dark chocolate and a final sprinkling of goji berries and pistachios. You only need a small bite to satisfy that sweet tooth but you’re getting all those good fats and protein that ought to keep you going until the next mealtime. In fact they work out as a good snack pre or post a gym workout.

DSC_0190

There is no baking involved, just a food processor doing most the work and a bit of elbow grease squishing it all into a tin before placing it in the freezer – couldn’t be easier really. It’s definitely a good treat to keep in the freezer when you fancy a pick me up treat without the bad stuff. Seb gave it the thumbs up too with a chocolate moustache displaying his approval.

They look pretty to look at too with the gorgeous green pistachios and bright red goji berries bursting with vibrant colour against the dark chocolate topping. In fact I’d say they are just about cute enough that you could serve these up if you were hosting an afternoon tea or hen do at your house as an alternative to all the cake on offer. And I wouldn’t be surprised if people asked you for the recipe to.

DSC_0191

Best get back to scheming the hen do now… any good ideas you have please send my way.

Nutty-oat chocolate bites topped with pistachios and goji berries

(Makes 20 small bites)

Ingredients

For the base:

2/3 cup oats

1/3 cup buckwheat groats

½ cup pecans, almonds, pistachios (or nuts of your choice)

10 medjool dates (de-stoned)

5 tbsp melted coconut oil

2 tbs of heaped almond butter (or nut butter of your choice – a smooth one though)

For the nut butter layer:

3-4 tbsp almond nut butter

For the topping:

200g dark chocolate (70% or high cocoa content)

large handful of goji berries

large handful or roughly chopped pistachios

Method

Place the oats, nuts and buckwheat groats in a food processor and blend to make a rough consistency – you still want some bite and crunch rather than a flour so it won’t take long.

Add half the oil and half the dates and blend again. Repeat with the remaining dates and oil. Add your nut butter and blend.

Spoon out your base into a lined baking tin (line the sides as well as the bottom to make removal easier at the end) about 20cm by 24cm in size and push down using the back of a spoon to make a flat even layer in your tin.

Place in the freezer for 10 minutes to harden up.

Once your base is cool and hard, spoon on a thin layer of nut butter over the base. Place back in the freezer for 10 minutes to harden up.

Melt your chocolate in the microwave in a bowl – 30 seconds at a time and then give a stir until you have a smooth chocolate. If you prefer you can melt your chocolate in a bowl over a saucepan of simmering water – just make sure the bowl doesn’t touch the water or you’ll burn the chocolate.

Pour your chocolate over your nut butter layer to make an even layer and quickly sprinkle your topping on before it hardens so that it sticks to the chocolate.

Place back in the freezer to harden for another 15-20 minutes before cutting into squares.

You can keep the chocolate bites in an airtight container in the fridge (for a week to 10 days) or freezer (for up to a month). If you’ve stored them in the freezer, make sure you take out a square about 30 minutes before you’d like to eat one so that they soften a little.


Posted in Baking, Biscuits and Cookies, Breakfast, Recipes, Snacks | Tagged , , , , , , , | Leave a comment